Creating Your Perfect DIY Golf Cart Cover: Protection with a Personal Touch
As golf cart proprietors, we get it the centrality of ensuring our cherished vehicles from the unusual and regularly unforgiving components that come with changing seasons. Enter the domain of "DIY golf cart covers" a domain where inventiveness and common sense meet to supply custom fitted arrangements for shielding our carts. In this post, we'll dig into the world of DIY golf cart covers, investigating the benefits, contemplations, step-by-step creation preparation, security rules, and much more.
Choosing the Right DIY Golf Cart Cover Design
Choosing the correct DIY golf cart cover plan includes considering different components to guarantee the cover meets your needs and expertise level. Here's a breakdown of the key contemplations:
Research Design Options:
- Explore different design ideas for golf cart covers. Finding online for motivation, designs, instructional exercises, and pictures of covers made by other DIY devotees.
Level of Weather Protection:
- Consider the climate and weather conditions in your area. On the off chance that you're in a range with overwhelming rain or snow, you might need a plan with superior coverage and more tough materials.
- Customization can add uniqueness to your cover.
Available Resources:
- Consider the materials and tools you have available. Some designs might require specialized tools or fabrics that you might need to purchase.
Budget:
- Determine the budget you're willing to allocate for the project. More complex designs might require additional materials, which can impact costs.
Functionality and Usability:
- Ensure that the design you choose provides practical functionality. The cover should fit well, be easy to install, and effectively protect your golf cart.
Flexibility for Modifications:
- Opt for a design that can be modified or adjusted if needed. Sometimes, minor alterations might be necessary during the crafting process.

Step-by-Step Guide to Creating a DIY Golf Cart Cover
Making a DIY golf cart cover includes a step-by-step preparation to guarantee exact estimations, legitimate sewing, and a well-fitting conclusion item. Here's a comprehensive direct to assist you through the method:
Step 1: Design a Pattern
Design a pattern or template using paper or fabric. Create separate pieces for the main cover sections, access points, clear panels, and any additional features. Consider the dimensions you measured in the previous step.
Step 2: Cut the Fabric
Using your pattern, carefully cut the fabric pieces. Ensure precise cuts to ensure proper fit and alignment. If using a template, trace it onto the fabric using chalk or a fabric marker.
Step 3: Sew the Main Sections
Begin sewing the main cover sections together. Start with the front and back panels, then sew the sides. Use pins to hold the pieces in place before sewing, ensuring straight and even seams.
Step 4: Attach Fasteners
If your design includes buckles, snaps, or other fasteners, sew them onto the cover where needed. These will help secure the cover in place during windy conditions.
Step 5: Test the Fit and Make Adjustments
Once you've completed the cover, test its fit on the golf cart. Make any necessary adjustments to ensure a snug and secure fit.
Step 6: Finalize the Cover
Review all seams and stitching to ensure they are secure. Trim any loose threads. If using zippers, ensure they glide smoothly.
Step 7: Try It Out
Install the cover on your golf cart and check its functionality. Make sure access points are easy to use, clear panels provide proper visibility, and fasteners hold the cover securely.
By taking after these steps and keeping up consideration to detail all through the method, you will make a DIY golf cart cover that gives successful assurance and a custom fit for your golf cart amid the winter months.

Tips for Enhancing DIY Golf Cart Cover Effectiveness
Improving the adequacy of your DIY golf cart cover includes cautious thought of plan and development components. Here are a few profitable tips to guarantee your cover gives ideal assurance and ease of use:
Use Weather-Resistant Fabrics and Materials:
- Opt for fabrics and materials that are designed to withstand the elements, including waterproof or rain-resistant options.
Seal Seams for Extra Protection:
- Apply seam sealant to fabric edges to prevent fraying and enhance water resistance along stitched seams.
Consider Ventilation:
- Incorporate vents or breathable sections to prevent condensation buildup under the cover, which can lead to mold or mildew.
Choose Reflective Elements:
- Add reflective tape or fabric to your cover to improve visibility and safety during low-light conditions.
Ensure Proper Fit:
- Aim for a snug yet not overly tight fit to prevent the cover from slipping off or causing stress on seams.
Test All Access Points:
- Check that access zippers, clear panels, and openings function smoothly and provide the intended functionality.
Avoid Sharp Edges and Abrasion:
- Design the cover to avoid contact with sharp edges on the golf cart or other objects that could cause friction and damage.
Inspect Regularly:
- Periodically check the cover for signs of wear, loose stitching, or potential weak spots. Address any issues promptly.
Consider Removable Features:
- If possible, design certain features to be removable for easy repair or replacement, such as clear panels or access zippers.
Test in Different Conditions:
- Once your cover is complete, test it in various weather conditions to ensure it performs as expected.
By actualizing these tips, you'll make a DIY golf cart cover that not as it were offers viable security but too addresses convenience, solidness, and potential improvements for your particular needs and inclinations.

FAQs
How difficult is it to make a DIY golf cart cover?
The difficulty level depends on your sewing or crafting skills, chosen design, and the features you want to include. Simple designs with basic coverage can be more beginner-friendly, while complex designs may require more advanced skills.
What type of fabric is best for a DIY golf cart cover?
Select a solid, weather-resistant texture like nylon, polyester, or canvas. Water-resistant or waterproof texture is perfect for included assurance against rain and snow.
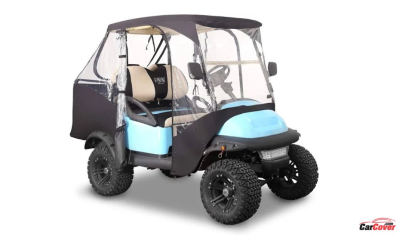
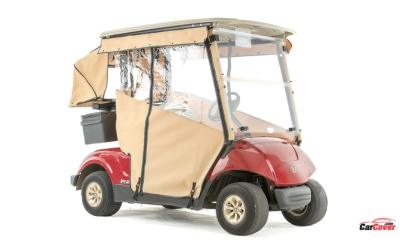
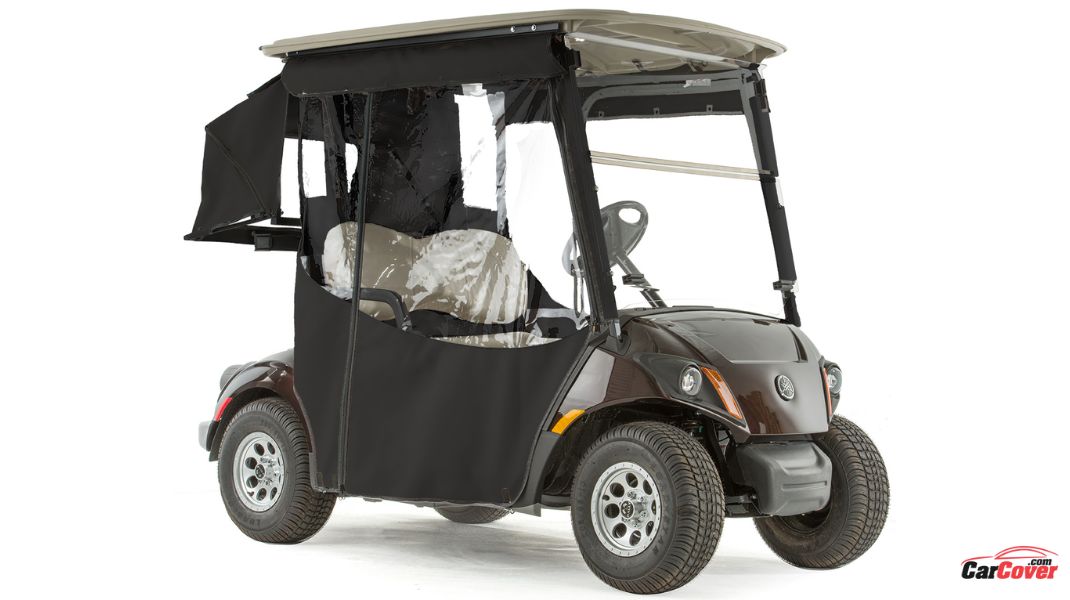
Can I add clear panels for visibility in my DIY cover?
Yes, you can add clear vinyl or plastic panels for headlights, taillights, or windshield visibility. Just ensure they are securely attached and don't obstruct your view.
How do I ensure my DIY cover is securely fastened to the golf cart?
Use elastic cords, drawstrings, buckles, or other fasteners to secure the cover snugly around the bottom of the cart. Make sure the cover is tightly fastened to prevent wind from getting underneath.
Can I drive the golf cart with the cover on?
Some DIY covers are designed for use while driving, especially if they have transparent panels for visibility. However, always ensure the cover doesn't obstruct mirrors or affect your ability to operate the cart safely.
How can I maintain my DIY golf cart cover?
Regularly clean the cover by spot cleaning with mild soap and water. Store it in a cool, dry place when not in use. Inspect it for wear and tear, and address any issues promptly.
Is it cost-effective to make a DIY cover compared to buying one?
The cost-effectiveness depends on factors like the materials you use and the complexity of the design. While a DIY cover might require an upfront investment in materials, it could be more cost-effective in the long run compared to purchasing a high-quality pre-made cover.
Can I personalize my DIY golf cart cover?
Yes, you can personalize your DIY cover by choosing colors, patterns, and even adding logos or monograms. Just ensure that personalization doesn't compromise the cover's functionality.
How do I ensure my DIY cover is safe to use while driving?
Ensure proper fit, secure fastening, unobstructed visibility, and accessibility to controls and pedals. Regularly check for loose parts, clear panels, and fasteners to ensure safe operation.
Are there DIY cover designs suitable for different weather conditions?
Yes, you can tailor your DIY cover design to the specific weather conditions in your area. You might need a more rugged design for heavy rain or snow, or a lighter cover for milder climates.

Final Thoughts
Keep in mind that making a DIY golf cart cover isn't as it were around security but moreover almost the fulfillment of crafting something together with your possess hands. By taking after the steps, tips, and rules given in this direct, you're well-equipped to set out on this imaginative travel and appreciate the benefits of a personalized and utilitarian cover for your golf cart.

Jenny